How do I set up pre-orders in one market and normal sales in another on Shopify?
If you have a product with stock available in one market (e.g. AU) but out of stock in another (e.g. US)., and you want to keep the product selling as normal in the AU and run pre-orders in the US., this is the help article for you.
In this article, we'll show you how to set up pre-orders in one market while selling normally in another using Shopify's built-in functionalities and our Early Bird app for added functionality. (And set clear expectations for US customers that it's a pre-order too.)
We answered the original question from a Shopify merchant here.
Important note: Before you begin, please read the Prerequisites & Limitations section below to confirm this approach will work for your store setup.
Prerequisites & Limitations
⚠️ Critical requirement for Shopify stores created before April 2024
If your Shopify store was created before April 2024, you must enable location-specific inventory tracking for this guide to work. Without this setting, Shopify will show global inventory levels across all markets instead of location-specific availability.
How to check if you need this:
- Go to Settings > Shipping and delivery
- Look for the "Only show fulfillable inventory" setting
- If you don't see this setting, your store is using the old fulfillment system
If you don't see it, please contact Shopify Support or your rep and request their help to activate it:
"Please enable location-specific inventory tracking for my store. I need to show different inventory availability across different markets. My store was created before April 2024 and appears to be on the old fulfillment system that shows global inventory levels."
Shopify may request temporary access to verify your Markets, Shipping, and Locations setup before enabling this feature. This is standard procedure.
Why this matters:
Without this setting enabled, customers in ALL markets will see the same inventory status (either all in-stock or all out-of-stock), regardless of which location actually has inventory.
Other requirements for this approach to work:
- You need to have two fulfillment locations registered in different countries (e.g., AU warehouse + US warehouse, or Local location + International location)
- Each location's registered address in Shopify matches where products physically ship from
- You're willing to manually manage inventory levels at each location to control availability per market
This approach will NOT work if:
- Both fulfillment locations are registered in the same country, even if one ships internationally via dropshipping
- Your inventory is managed by a third-party dropshipper whose business registration is in the same country as your primary warehouse
Why this limitation exists:
This setup relies on Shopify's Markets (which determine geographic targeting and pricing) working together with Locations (which handle inventory management and fulfillment). When you configure shipping profiles to only fulfill from specific locations to specific markets, Shopify will check inventory at the assigned location for that market.
However, when both locations are registered in the same country, Shopify's system may not reliably differentiate which location's inventory to check for customers in different markets. This can result in customers seeing incorrect availability status.
What you're actually controlling:
- Markets: Which countries can purchase from your store
- Locations: Where your inventory is physically stored
- Shipping profiles: Which locations fulfill orders for which markets
- Inventory levels: Setting stock to 0 at one location triggers "out of stock" or enables pre-orders
Alternative for dropshipping scenarios:
If you're working with a dropshipper whose registered business location doesn't match where they physically ship from, this approach may not work reliably. You may need a custom solution. Contact us at support@shopside.com.au if you need Shopify Partner agency recommendations for your scenario.
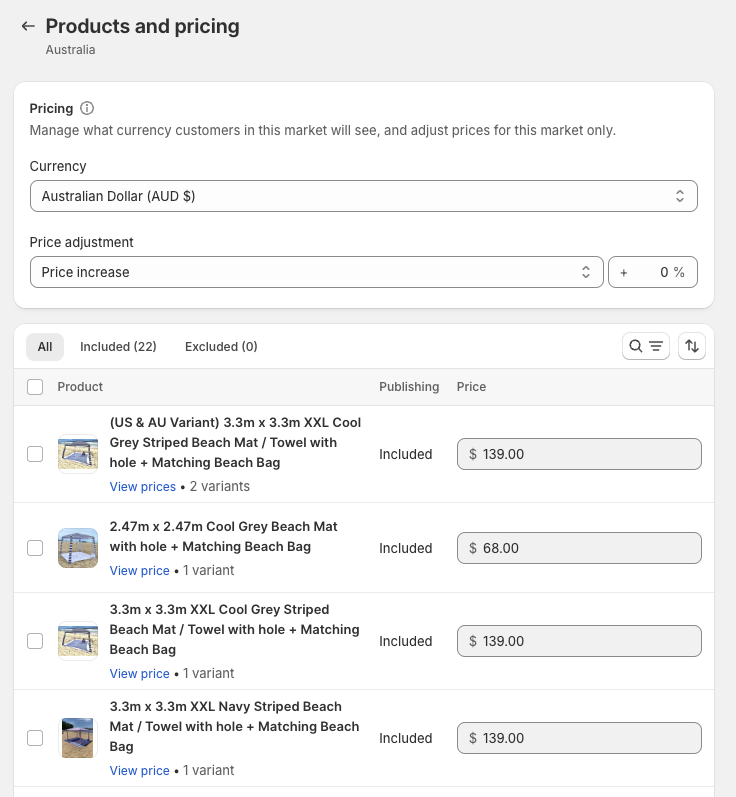
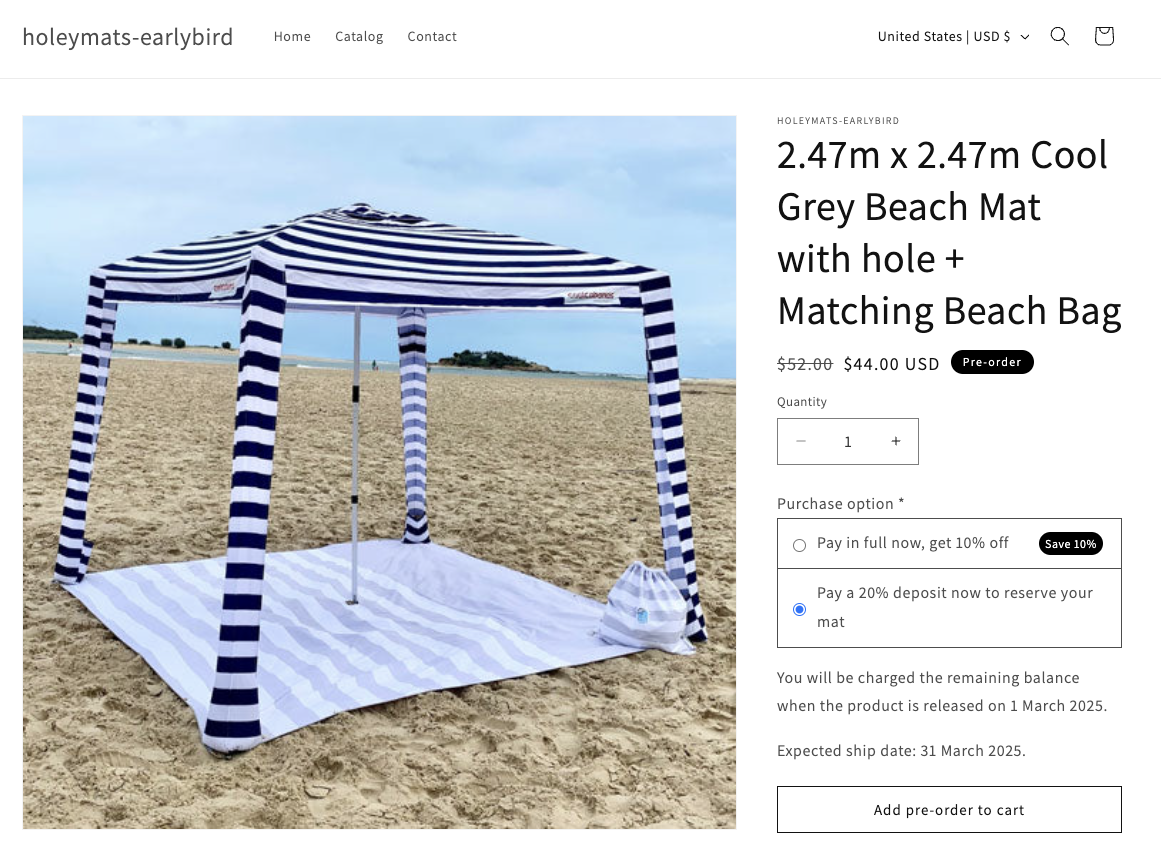
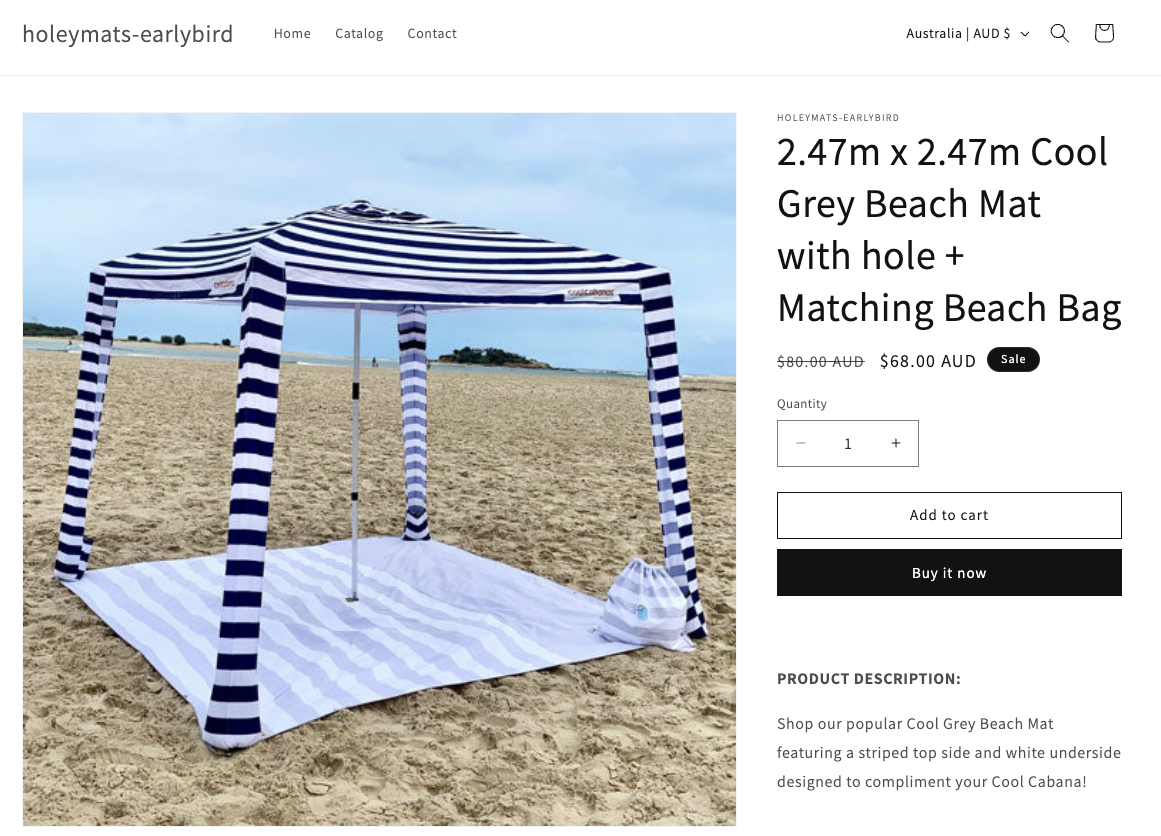
Our approach below separates your inventory by location and ensures customers in each market see the correct product availability. Screenshots are taken from our test development store. We'll be using AU and US as location examples, and the 2.47m Cool Grey Beach Mat as product example.
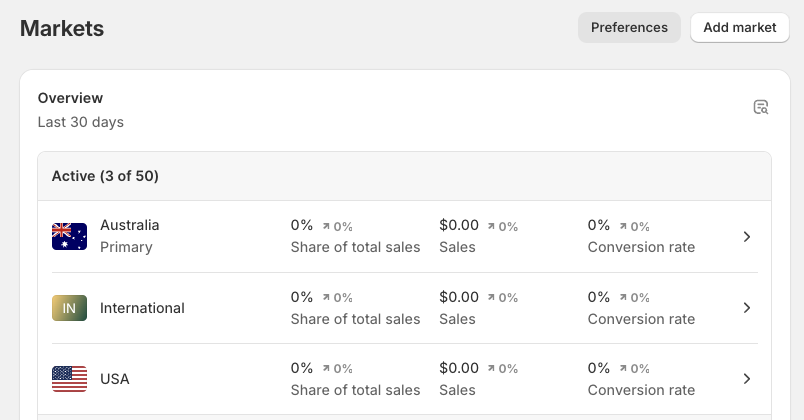
Step 1: Set up markets
- Go to Settings > Markets in your Shopify admin.
- Ensure your AU and US markets are activated and include the product in both markets.
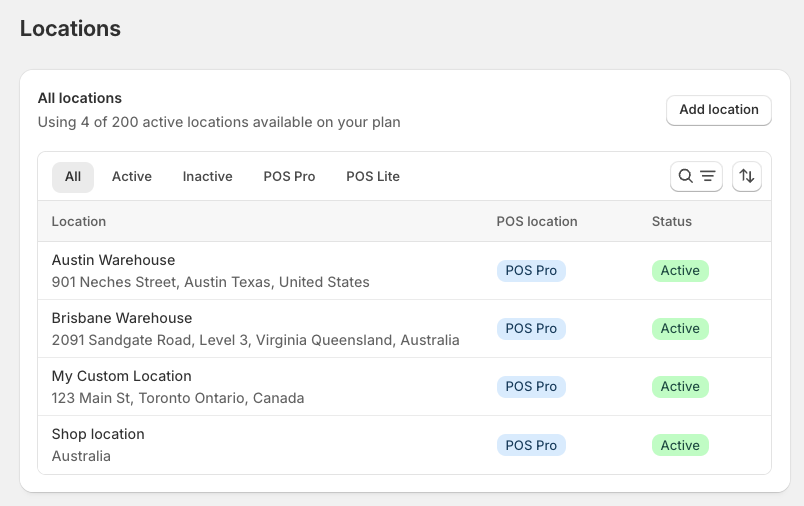
Step 2: Create separate locations
-
Navigate to Settings > Locations.
Create two locations to represent your AU and US inventory separately:
- One for your AU inventory.
- One for your US inventory.
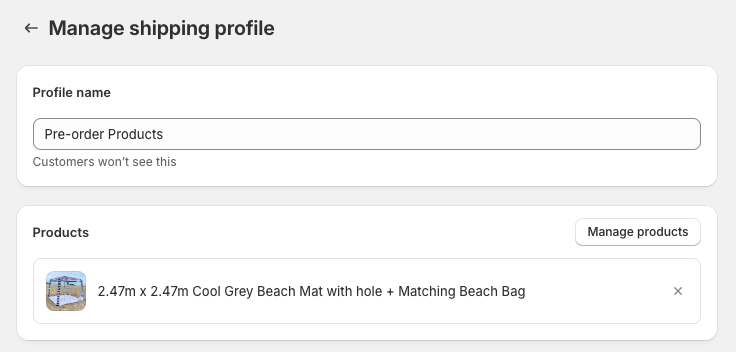
Step 3: Create custom shipping profiles
- Go to Settings > Shipping and Delivery.
- Under the Shipping section, create a new custom profile for the product.
- Under the Products section, click Manage Products and include the product.
- Add the two locations you created earlier as separate fulfillment locations.
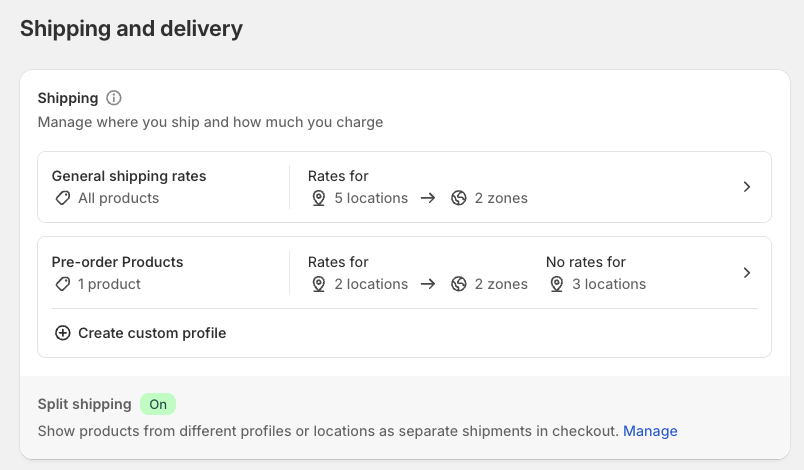
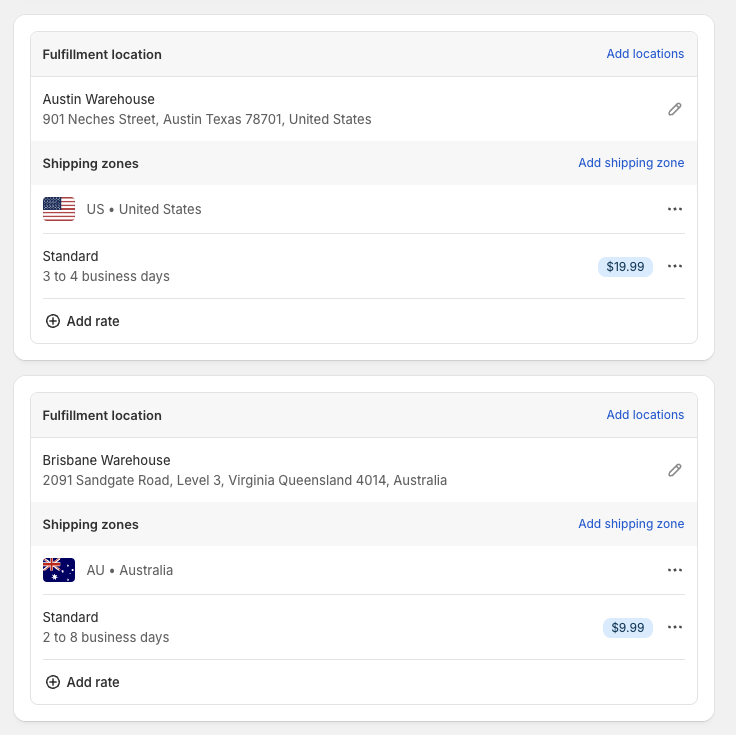
Step 4: Set up shipping zones for each location
- In the new custom shipping profile, scroll to the Shipping zones section.
- Assign only the AU location to the Fulfillment location with the AU warehouse.
- Assign only the US location to the Fulfillment location with the US warehouse.
- Adjust shipping rates as needed for each zone.
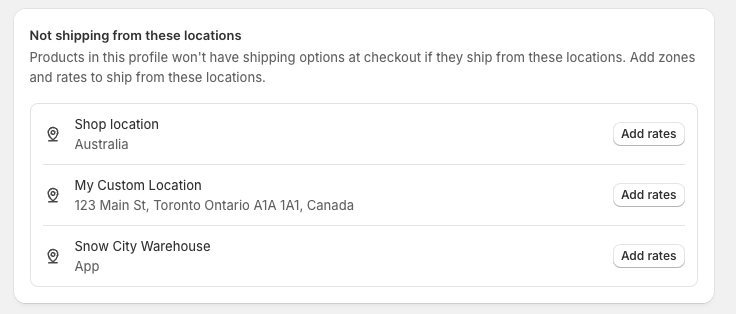
- Scroll down to the Not shipping from these locations section and exclude all other fulfillment locations to prevent customers from ordering inventory from the wrong market.
Step 5: Enable back-order functionality for pre-orders
-
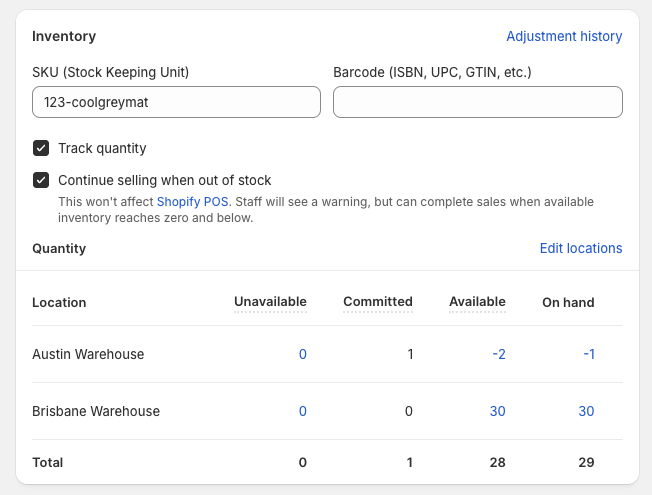
For the product you’re managing, enable Continue selling when out of stock under the Inventory section of the product settings.
Make sure you inform customers that the product is a back-order item:
- You can add a note to the product name or description.
- If your theme has a built-in functionality to display badges or labels with custom text, utilise it to set expectations for customers - e.g. “Pre-order now” or “Ships in 2 weeks.”
Step 6: Consider using a pre-order app for advanced features
If you need functionalities such as partial payments (deposits) or want to display pre-order information prominently across the cart and checkout pages, a pre-order app like ours (Early Bird) can serve as an out-of-the-box solution and help you offer a great pre-order customer experience.
Testing the setup
Finally, test the setup before you start driving traffic to the product page:
- View the product as a US customer to confirm it displays as out of stock or pre-order.
- View the product as an AU customer to confirm it displays as in-stock and available for immediate purchase.
Optional: Customize checkout messaging per market (Added March 2026)
Once your multi-market pre-order setup is working correctly, if you're on Shopify Advanced or Plus plans, you can enhance the customer experience by customizing checkout messaging for each market using Shopify's native checkout editor.
As of March 2026, Shopify Advanced and Plus stores can customize checkout branding and messaging per market. This means you can show pre-order ETAs, shipping disclaimers, or trust badges only to specific markets without cluttering checkout for customers in other regions.
To access this (in Shopify, not Early Bird):
- Go to Settings > Checkout in your Shopify admin
- Click Customize
- Select your market from the dropdown at the top
- Add market-specific text blocks, branding, or extensions
Important note: This is a Shopify checkout customization feature, not part of Early Bird. It is purely presentational - it controls the visual and messaging layer of checkout only. It does not change inventory routing, fulfillment locations, or pre-order functionality.
Check out Shopify's official guide to customizing checkouts for markets here.
Now you should be able to manage pre-orders and normal sales across different markets.
If you encounter any issues or have further questions, please email us at support@shopside.com.au.